Chromed Shark

My various ramblings about programming

U-verse IPv6 With ASUS RT-N66U

Back in February of last year, details of how to connect to U-verse’s 6rd border router started to show up. I’ve been interested in setting up IPv6 since then, and finally purchased an IPv6-capable router, upgrading from a D-Link DGL-4500 to an ASUS RT-N66U.

Note: To simplify the instructions, I’m not going to talk about setting up the router to work in concert with the AT&T provided residential gateway. There are many different posts around the internet detailing exactly how to set up your own router as the primary one for your network.

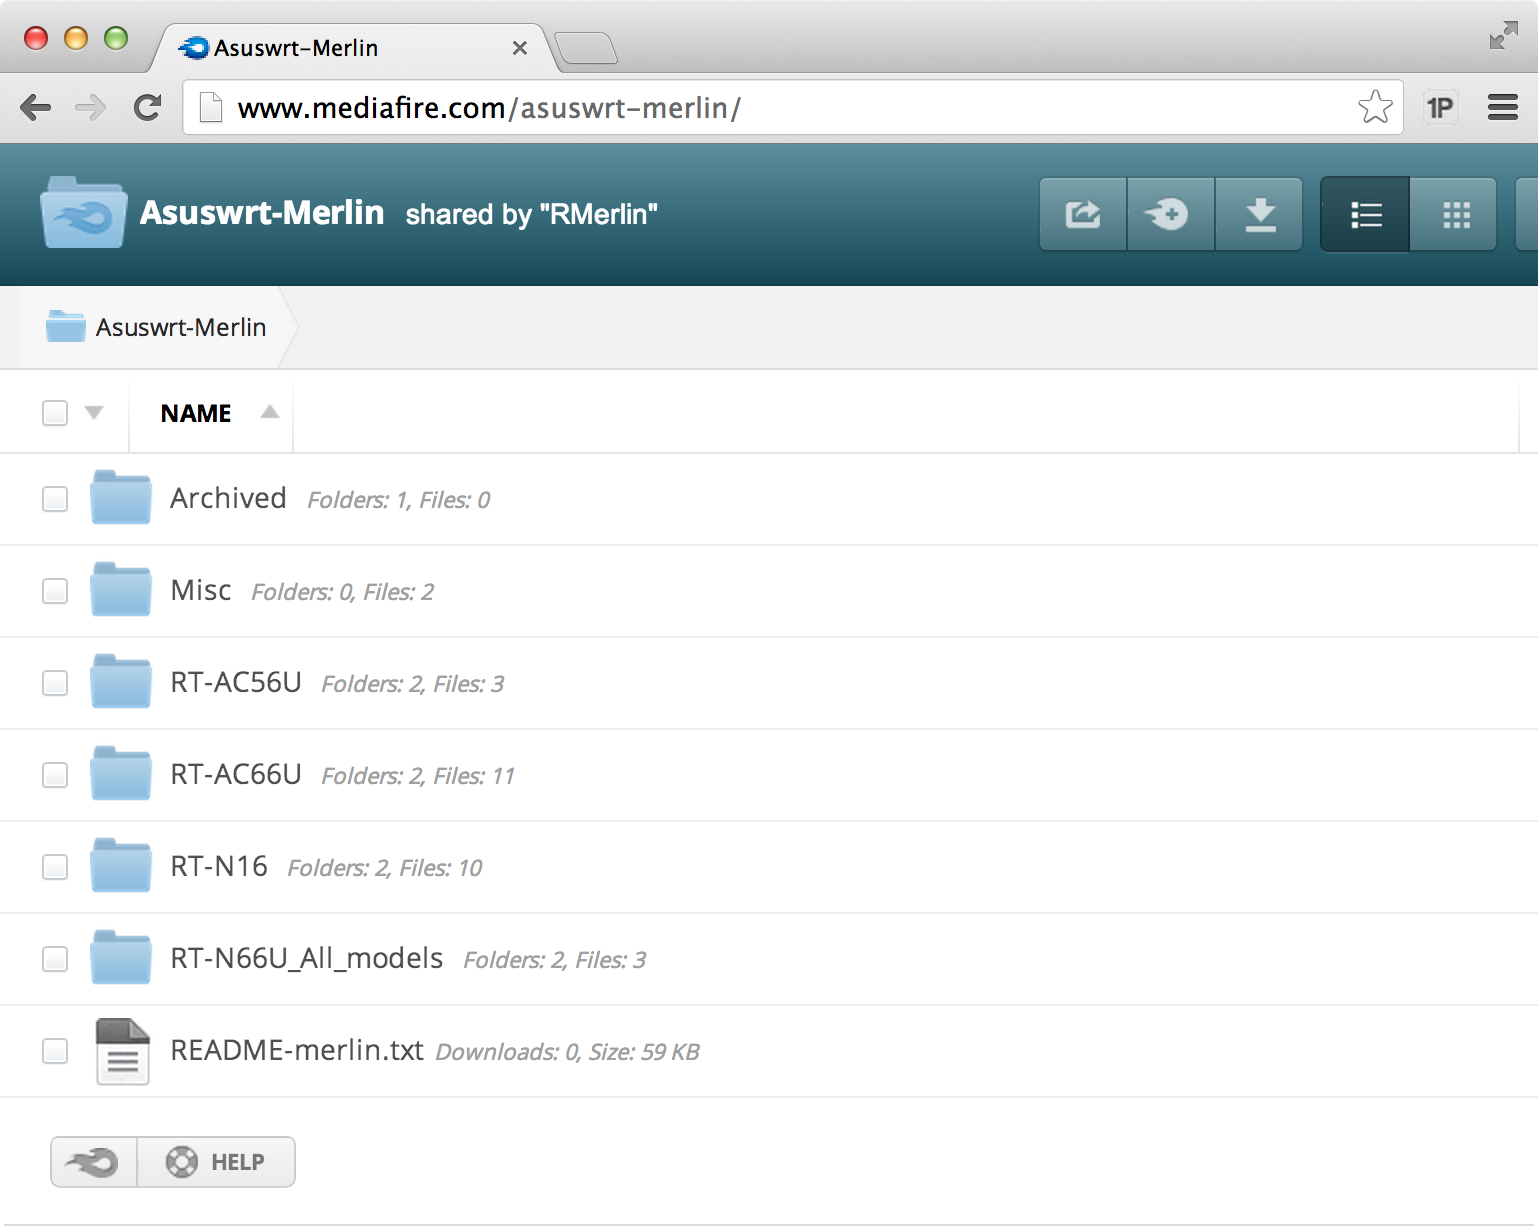
One of the most interesting benefits of IPv6 is that every computer can have it’s own globally unique IP address, allowing direct access to any computer in the network over the internet. The downside is that a firewall is now required to ensure that unwanted access is forbidden. Thus, the first step in the process was figuring out how to provide an IPv6-capable firewall. The stock firmware does not include one, but RMerlin has a firmware variant that is close to stock that does include one. The latest version can be found at mediafire.com/asuswrt-merlin/ in the “RT-N66U_All_models” directory.


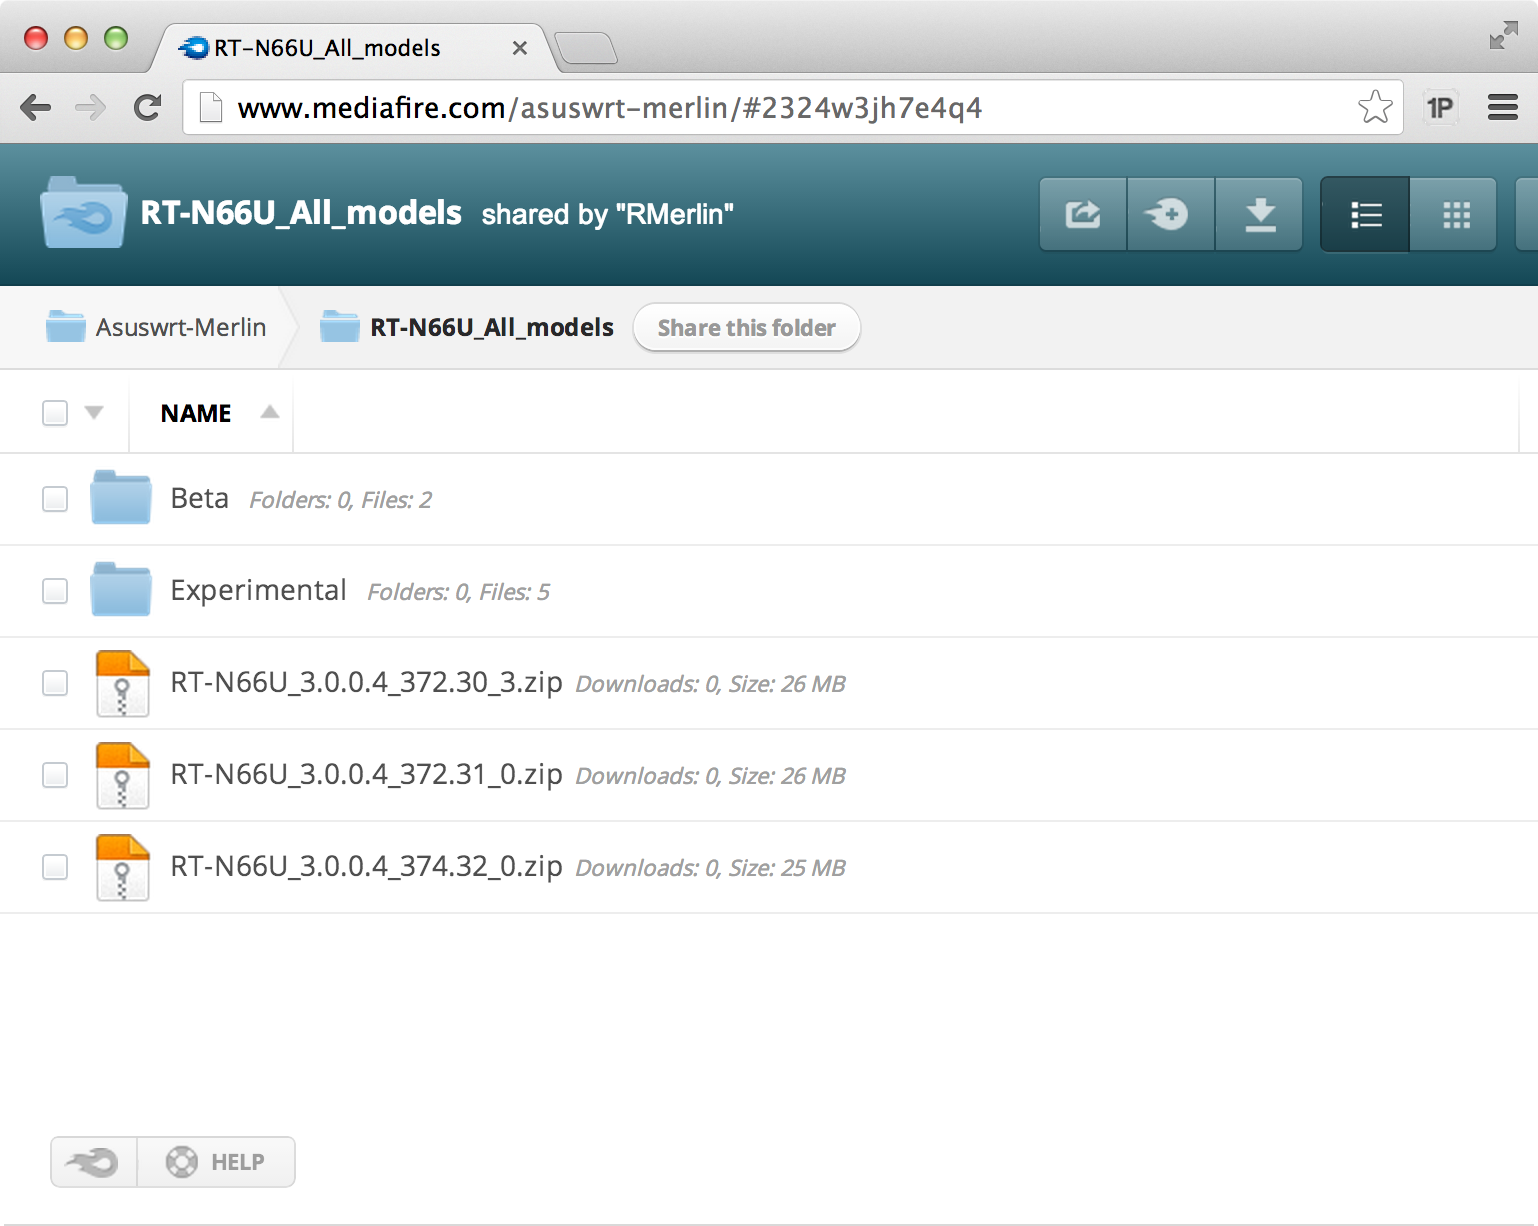
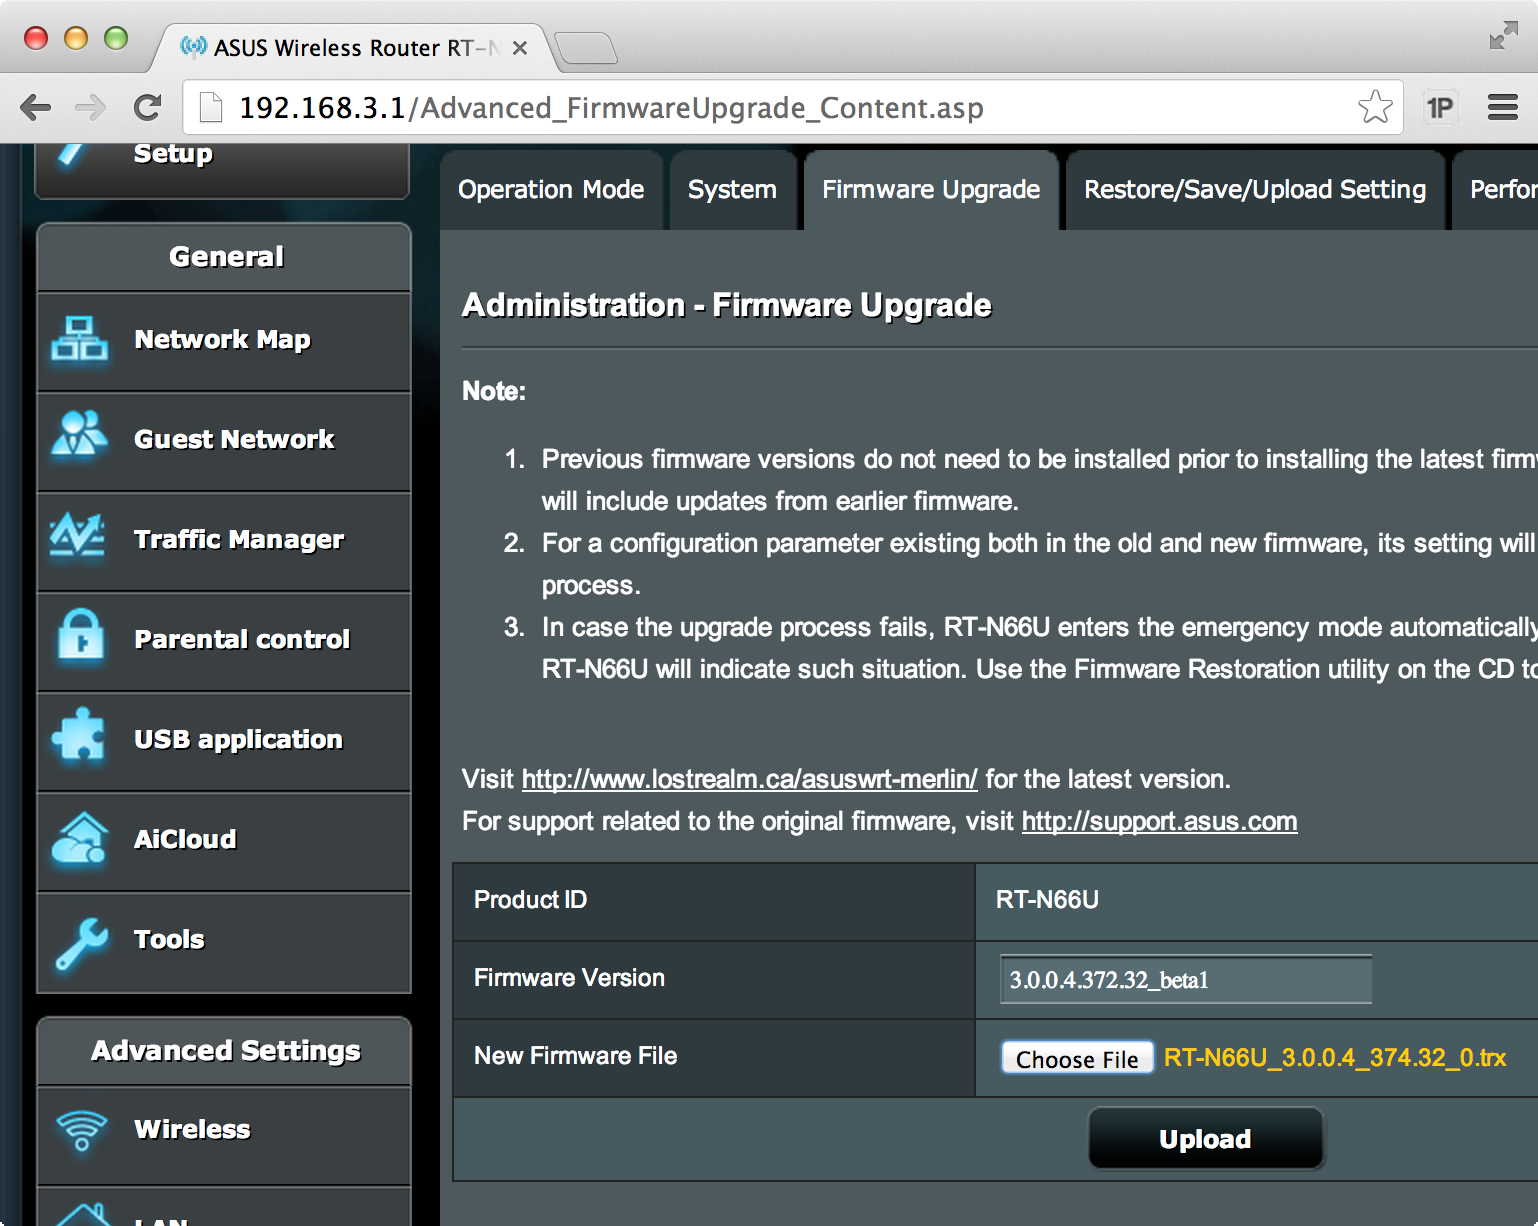
Download the latest version and unzip it to get the firmware file and a more comprehensive README. It is strongly advised that you read the README before upgrading your firmware. To install, open up the router “Administration” section and go to the “Firmware Upgrade” tab. Choose the “TRX” file from the zip and click Upload.

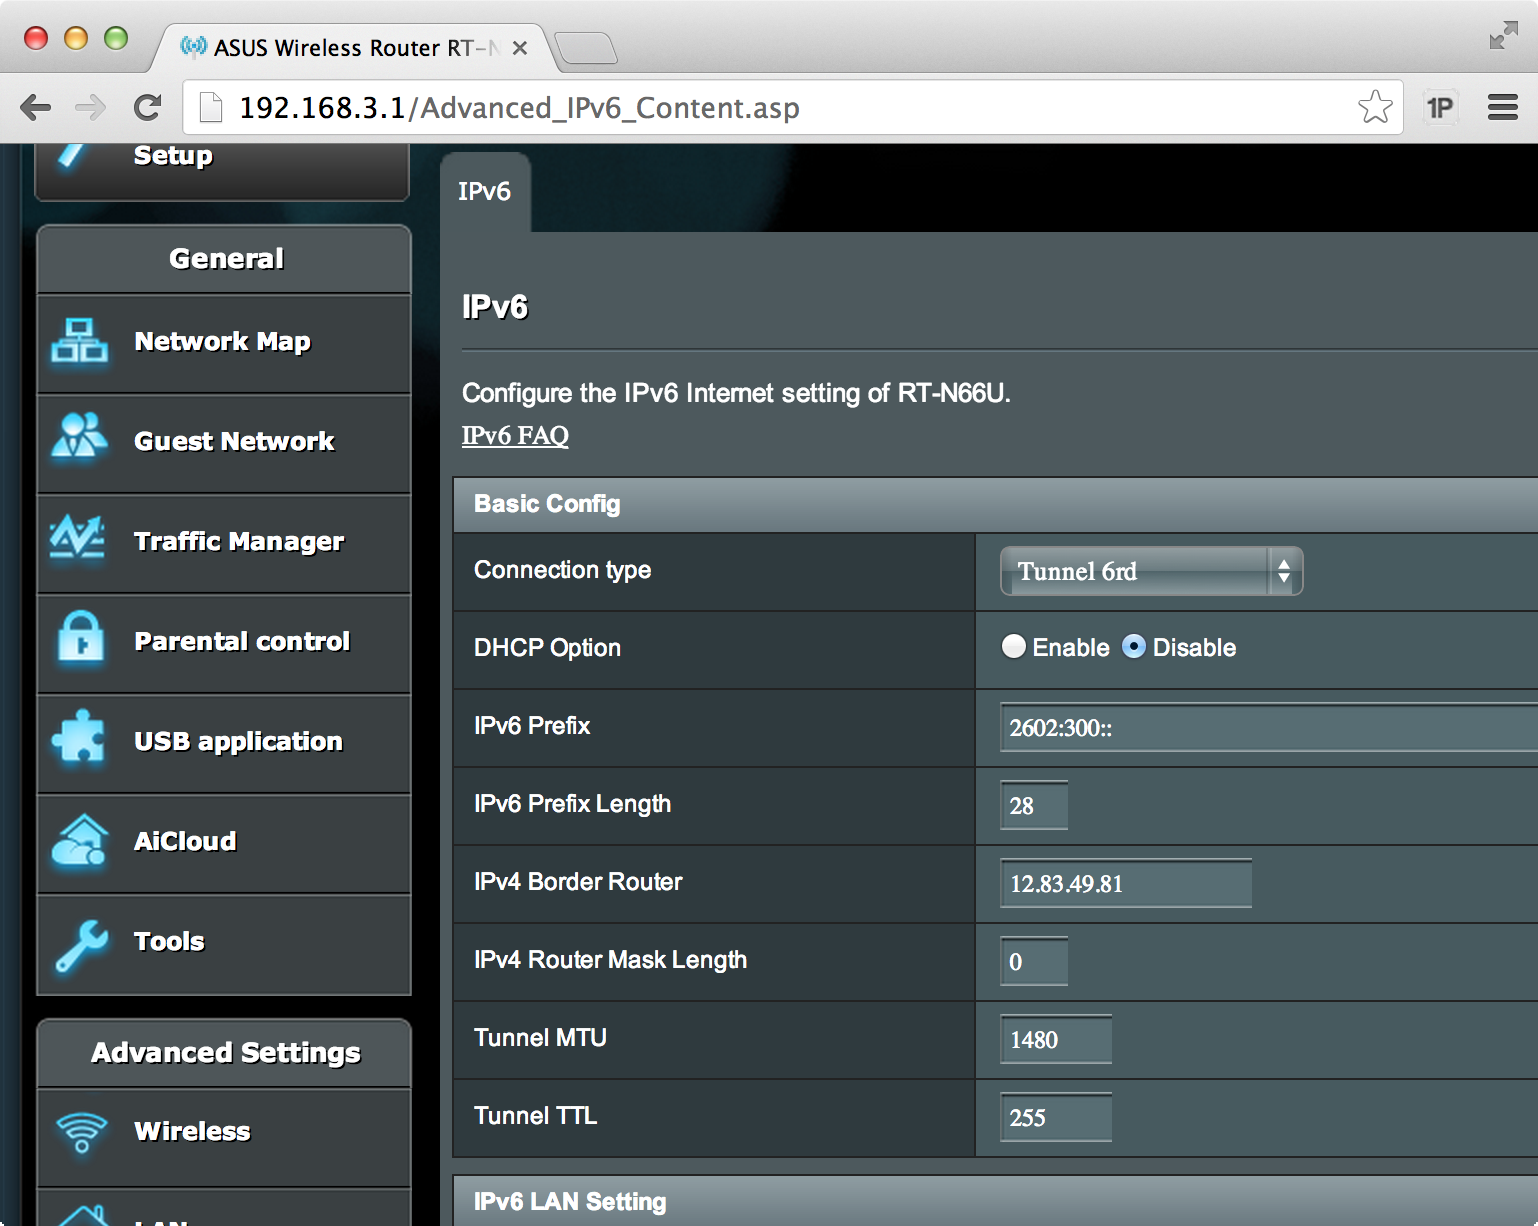
Once the update process completes, it’s time to configure IPv6. Go to the IPv6 section in the router configurations and configure it like the image below. You will also need to pick an IPv6 DNS server - I’m using Google Public DNS, which has the following IPv6 addresses: 2001:4860:4860::8888 and 2001:4860:4860::8844. The IPv6 Firewall is on by default, so nothing needs to be done to configure it.

Congratulations! You are now running a dual-stack network. You can test it out by visiting test-ipv6.com.

SWF Verification and Flex RSLs

I have been playing around with SWF Verification in Flash Media Server (or Adobe Media Server as it’s now called), and was unable to get it working after several hours of effort. I finally found this posting, and after re-compiling my swfs with -static-rsls on, I was able to get it working.

So if you are ever having trouble with SWF Verification, make sure you are not loading any additional SWCs at runtime, or you may have trouble.

Installing Ruby 1.9.2 Using RVM and Homebrew on Lion

There seem to be a lot of people having trouble installing Ruby 1.9.2-p290 under Lion, based off of the many blog posts about changing the C compiler and using MacPorts, Homebrew, and/or RVM to install a bunch of dependencies. Below is the process that I used to install it. I’m not quite sure why RVM automatically used /usr/bin/gcc-4.2 to compile everything on my computer, and why some people need to set some environment flags to change their default compiler to this. If you are getting compiler errors, you may need to run export CC=gcc-4.2 before the rvm install step.

First, we’re going to install a newer version of the readline library. I used Homebrew for this, but you should be able to use rvm pkg install readline as well.

1
brew install readline

Once that is finished, take note of where Homebrew said it installed readline. For me, that path was /usr/local/Cellar/readline/6.2.1 (minus the lib directory).

Next, we’re going to update RVM to make sure there aren’t any issues with Lion and Ruby 1.9.2 that haven’t been solved in the latest release.

1
2
rvm get latest
# rvm get head upgrades to the latest dev release

The last step in this process is to install Ruby 1.9.2-p290. If you used RVM to install readline, your path for readline should be changed to $rvm_path/usr. If you are using MacPorts, your readline path should be changed to /opt/local.

1
2
3
rvm install 1.9.2 -C --enable-shared,--with-readline-dir=/usr/local/Cellar/readline/6.2.1 \
--with-iconv-dir=/usr --with-zlib-dir=/usr --with-openssl-dir=/usr,\
--build=x86_64-apple-darwin10

Update on Ruby-audio

As a lot has changed over the past two weeks with ruby-audio, I thought an update would be in order.

After trying to put the existing version (0.2.0) into production code, I ran into a whole bunch of issues with the API. It was not ruby-like at all, which made the code I was writing look ugly. In addition, reading into a small buffer and writing out to a new sound wasn’t possible to do without a lot of unnecessary object instantiation, as there was no API for writing only a portion of a buffer out to the sound. Hence, a rewrite was in order. Armed with copies of the ruby 1.8 and 1.9 source code, I set out to re-write the C extension with a prettier API and without the previous version’s issues. The result is ruby-audio version 1.0 (now 1.2.0 as of this writing).

ruby-audio now has three data classes - Sound, Buffer, and SoundInfo. These correspond to their C parents - CSound, CBuffer, and CSoundInfo. SoundInfo maps to the SF_INFO struct, providing information like sound length, channel count, and format. Buffer is a thin wrapper around a C array of one of the four datatypes supported for read and write by libsndfile. Finally, Sound provides all the standard functions you would expect from an IO object, including seeks, reads, and writes.

With that out of the way, let’s look at some code. The following example takes an array of compatible sound files and numbers and turns it into a single one-channel wav.

1
2
3
4
5
6
7
8
9
10
11
12
13
14
15
16
17
18
19
20
21
22
23
24
25
26
27
28
29
30
31
32
33
34
35
require 'rubygems'
require 'ruby-audio'

# Create wav output file
info = RubyAudio::SoundInfo.new :channels => 1, :samplerate => 44100,
                                :format => RubyAudio::FORMAT_WAV|RubyAudio::FORMAT_PCM_16
out = RubyAudio::Sound.open('out.wav', 'w', info)

# Initialize read/write and pause buffers
one_sec = RubyAudio::Buffer.double(44100)
one_sec.real_size = 44100
buf = RubyAudio::Buffer.double(10000)

# For numbers, insert a pause for the given number of milliseconds
# For strings, open the sound file and append
wavs.each do |wav|
  if wav.is_a?(Numeric) # Pause
    secs = (wav/1000).to_i
    millisecs = wav % 1000

    # Handle milliseconds
    if millisecs > 0
      one_sec.real_size = (44100 * millisecs/1000).to_i
      out.write(one_sec)
      one_sec.real_size = 44100
    end
    secs.times { out.write(one_sec) }
  else
    RubyAudio::Sound.open(wav, 'r') do |snd|
      out.write(buf) while snd.read(buf) > 0
    end
  end
end

out.close

If you have any issues with the API or features you’d like to see implemented, don’t hesitate to fork and fix it on github, add it to the issues, or send me an e-mail.

Revival of Ruby/audio

I needed to do some audio concatenation for a project I’m working on, and after much research, came to the conclusion that libsndfile would be the easiest to work with. However, with all of the overhead of calling out to a command-line program for every file I wanted to join, I figured it would be better to write a C-based gem wrapper around it. Thus, ruby/audio.

Google quickly led me to Hans’ ruby-audio, which hadn’t had any major modifications since November of 2006. Looking at the forks lead to the most recent fixes by others. After finding and fixing a bug noticed in my audio concatenation project, I decided to turn it into a gem and put it up on Gemcutter.

If you’d like to get started using it, first install ruby-audio from gemcutter: gem install ruby-audio --source="http://gemcutter.org"

Afterwards, simply require audio/sndfile and start writing code. Here’s an example that concatenates a list of files and writes the final file to out.wav.

1
2
3
4
5
6
7
8
9
10
11
12
13
14
15
16
17
18
19
20
21
require 'rubygems'
require 'audio/sndfile'

out_conf = Sndfile::SF_INFO.new
out_conf.format = Sndfile::SF_FORMAT_WAV|Sndfile::SF_FORMAT_PCM_16
out_conf.channels = 1
out_conf.samplerate = 44100
out = Audio::Soundfile.open('out.wav', 'w', out_conf)

['audio1.wav', 'audio2.wav'].each do |file|
  snd = Audio::Soundfile.open(file)
  buf = Audio::Sound.float(1000)
  read = snd.read(buf)
  while read != 0
    out.write(buf)
    read = snd.read(buf)
  end
  snd.close
end

out.close

My code can be found Github at warhammerkid/ruby-audio, and I expect to make a few more modifications to it to clean up the API and improve the documentation over the next couple weeks.

Rack Middleware in Rails 2

If you have a rack middleware packaged as a gem that you would like to use in your rails app, add these lines to your environment.rb file:

1
2
config.gem 'rack-amf', :lib => 'rack/amf', :source => "http://gemcutter.org/"
config.middleware.use 'Rack::AMF', :url => '/amf'

Make sure you put the middleware name in a string, or rails initialization will fail because the gem hasn’t loaded yet.

Strings in AS3 and Memory

I was doing some experimenting to see whether having multiple references to a string took up much space, and it turns out that Flash doesn’t actually deep-copy strings when you copy them around. Instead it copies by reference until a change is made, which then forces a deep copy. This is similar to the way PHP works, passing strings by value but not actually creating a new object until the value is changed. Below is the code I used to determine this:

1
2
3
4
5
6
7
8
9
10
11
12
13
14
15
16
17
18
19
20
21
22
23
24
25
26
27
28
29
30
31
32
33
34
35
36
37
import flash.system.System;
import flash.utils.ByteArray;

function clone(source:Object):* {
    var copier:ByteArray = new ByteArray();
    copier.writeObject(source);
    copier.position = 0;
    return(copier.readObject());
}

var str:String = "This is a test of string copying";
var storeA:Array = [];
var storeB:Array = [];
var before:int;

// Test A
before = System.totalMemory;
for(var i:int = 0; i < 10000; i++) {
    storeA.push(clone(str) as String);
}
trace(System.totalMemory - before); // Total Mem Increase: 3280896

// Test B
before = System.totalMemory;
for(var j:int = 0; j < 10000; j++) {
    storeB.push(str);
}
trace(System.totalMemory - before); // Total Mem Increase: 49152

// Can you change str without affecting storeB?
str = "New value";
trace(storeB[0]); // 'This is a test of string copying'

// Can you change storeB[0] without affecting storeB[1]?
storeB[0] += 'a';
trace(storeB[0]+" vs "+storeB[1]);
// 'This is a test of string copyinga vs This is a test of string copying'